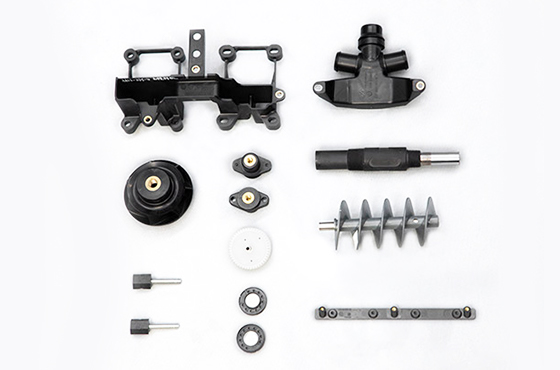
Injection molding is one of the most common and readily available processes to manufacture your products. The versatility of injection molding makes it ideal for a wide range of products, but that doesn’t mean that certain design aspects and considerations can be overlooked. Understanding the injection molding process and the quality of the product design that best suits it can significantly improve production run efficiency and the quality of the final product.

Incorporating some of these design principles into your injection molding design is worthwhile and can save you time. Read below for more information on injection molding design tips.
Remember the necessity of the process. A quick refresher on the injection molding process: The two halves of the mold are hollowed out and carry the negative image of the part. Hot, liquefied plastic or rubber is injected into the mold and cooled. After the injection mold design has cooled, the two halves of the mold are pulled apart, and the part is released.
From this process, there are a few points to remember.
During the injection process: There must be a location in the mold and on the part for the base material to be injected. This gate must be removed from the finished part (this can happen automatically or manually). Gate location is essential in injection molding design – you typically want to locate the gate in a thicker cross-section of the part so that the gate can be removed without worrying about the part’s structural integrity. Gate removal may also leave scars – a point to consider, as part of appearance is an issue.
During cooling: Your liquefied plastic or rubber material will shrink as it cools and solidifies. Be sure to consider this not only when laying out part dimensions but also when designing elements, such as adding radii at corners and considering wall thickness.
During part release: When the two halves of the mold are separated, there is always a so-called “parting line,” which is a natural combination of the mold’s two separate halves. This is different from mold pulling, which is caused by a defect in the mold or machine and cannot be avoided – it is best to design your part to plan the parting line location.
Consider wall thickness: Some stores will tell you they can only produce injection molded parts with uniform wall thickness. While this can make the part easier, it is optional. However, varying wall thicknesses do make the process more difficult. This is because of the above cooling process: thicker wall areas cool and solidify more slowly than thinner areas. Combined with the shrinkage factor during cooling, poorly designed molds and products can suffer from uncooled, still-liquid substrates running into areas of the part where they should not be placed.
Manage this potential problem by designing your parts with manufacturability in mind. For example, thicker areas can be located in the lower part of the mold, allowing gravity to help keep the still-cooling material where it belongs. The problem? We are always happy to offer our expertise in manufacturing design and can help you build the parts you need while considering the process’s practicality.
Merge Draft: When you remove the ice cubes from the tray, you will see the concept of draught at work. Each cube cavity in the tray is tapered to allow for a smooth exit process without trying to pry the cube out of the tray. The draft in the injection molded product design serves the same purpose. Adding a few degrees of taper (depending on the material and product design) means the part will exit the mold more smoothly, with minimal friction and scuffing between the finished, cooled product and the mold walls. The surface of your part remains intact, and the process moves more efficiently.
Build Texture: Instead of adding a second finishing process to create texture for your product after injection molding, incorporate the desired finish, pattern, or texture directly into the mold. By etching or milling the mold to complete the finish, you can better control the look and feel of the part and maintain consistency, saving time and money by combining the two processes.
Know your material: This tip covers most of what has been covered in this article, but it’s important to remember: material selection is one of the most critical considerations when designing your piece – it affects many aspects of the process, including shrinkage factor, cooling time, flexibility, and more. For example, different materials may have different minimum and maximum wall thicknesses or require different mold-pulling degrees.
